Use For:
- Concrete Paths
- Sidewalks
- Concrete Patios
- Decorative Yard Displays
- Around Pools
Building concrete patios and walkways that resemble brick or cobblestone is an easy do-it-yourself project with Walk Maker® reusable plastic molds. Walk Maker® molds offer unlimited designs and can be used with a variety of QUIKRETE® Concrete Mixes.
Site Preparation
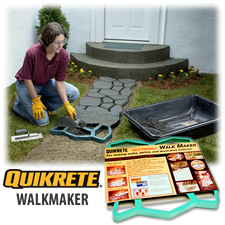
Place the Walk Maker® mold in the desired location. Walk Maker® molds can be placed directly on any relatively flat surface. They will configure the concrete to the existing base. If you prefer, you may remove one inch of top soil and level the Walk Maker® mold before filling it with concrete. Removed soil can be used to fill in open spaces alongside concrete after the walk has set up.
Mixing and Placement
- Add sufficient water for the amount of concrete being mixed.(Roughly 6 pints (2.8L) of water to each 80 lb. bag, or 4.5 pints (2.1L) water to each 60 lb. bag of Fiber-Reinforced Concrete Mix). Mix thoroughly until plastic-like consistency is achieved. If additional water is required, add small amounts until the proper consistency is obtained. (Water amount varies depending on heat and humidity).
- Use a shovel or trowel to fill each mold cavity to the surface of the mold. Pat and smooth the surface with a trowel.
- While concrete is still in mold, pat and smooth the surface with trowel, and remove the mold promptly. (Material should be stable but flexible during this time)
- After removing mold, smooth all edges with a trowel until the appearance is satisfactory. Dipping the trowel in water may be helpful. Place mold adjacent to the completed section and continue this process until your project is complete.
- If desired, QUIKRETE® Sand Mix or Mortar Mix can be applied dry to the hardened concrete to fill the joints. Brush or sweep the dry mix into the joints and moisten.
- To protect your finish, use QUIKRETE® Acrylic Concrete Sealer. Concrete Sealer provides a water-resistant coating and also protects concrete surfaces from the deteriorating effects of grease, oil, salt, and most household chemicals.
Adding Color and Surface Texture
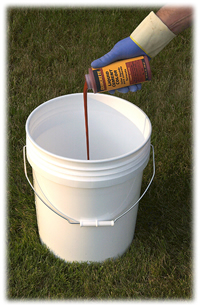
- Color may be added to any Walk Maker® project with QUIKRETE® Liquid Cement Color. Ten ounces of liquid color should be used for every two 60 or 80 lb. bags of any QUIKRETE® Concrete Mix.
- Mix 1-1/4 gallons of clean water for every 10 ounces of color. When using a mechanical mixer add both liquids to the mixer and then add the concrete mix. When hand-mixing in a tub or wheelbarrow, mix the color and water, and then add the liquid to the concrete mix.
- Mix thoroughly until the concrete is uniform in color. Add water as needed to achieve consistency.
- A variety of surface textures may be achieved by experimenting with different toppings. This should be done while the concrete is still damp but has reached initial set (approximately one hour after concrete has been placed). Some ideas include: small wood chips or pea gravel pressed into the surface of the concrete; irregular trowel imprints; and brushing QUIKRETE® Play Sand on the surface.
Corners and Curves
For corners, simply butt the Walk Maker® mold to the last section poured, align in the direction of the turn and continue.
When making curves, there are two options:
- Butt outside corner of the mold to the existing concrete, align the curve, and press down on the mold, cutting the freshly placed concrete on the inside corner. Remove the mold and refinish the cut portion of the concrete. Place the mold, fill with concrete, and continue making cuts as necessary to attain the proper curve alignment.
- Butt inside corner of the mold to the existing concrete. Fill in the space between the mold and the existing concrete on the outside of the corner. Free form the fill-in space. Level, finish, and shape the fill-in concrete to the desired appearance. Continue the procedure until the curve is complete.
Estimating Amount of Concrete You’ll Need
From outside edge to outside edge, each Walk Maker® is 2′ x 2′ ; however, the Country Stone pattern interlocks, and length of walls can be estimated by this chart. (The Running Bond Brick pattern does not interlock and provides a consistent 2′ x 2′ section.)
| Length of Path | # of Sections | # of 80 lb. Bags Required | # of 60 lb. Bags Required |
| 2′ | 1 | 1 | 1-1/3 |
| 3’9″ | 2 | 2 | 2-2/3 |
| 5’6″ | 3 | 3 | 4 |
| 9′ | 5 | 5 | 6-2/3 |
| 16′ | 9 | 9 | 12 |
| 23′ | 13 | 13 | 17-1/3 |
| 30′ | 17 | 17 | 22-2/3 |
Recommended Mixes
We recommend QUIKRETE® Fiber Reinforced mix and QUIKRETE® Fiber Reinforced mix for this application.